How to add conditional logic to Airtable forms
Airtable forms don't support conditional logic. Not partially. Not with a workaround. Not on higher plans.
There is no way to show or hide a field based on a previous answer in a native Airtable form. Every user sees every field, every time.
If you've been searching for a setting to turn this on, you won't find one. It doesn't exist.
Here's how to actually solve it.
Need conditional forms now Filla supports show/hide logic, dynamic linked record options, and multi-step conditional paths, all native to Airtable
What conditional logic means for forms
Before getting into the how, it's worth being precise about what conditional logic actually covers. It's not one thing.
Show/hide fields
The most common type. A field appears (or disappears) based on a previous answer.
Example: A client intake form asks "What type of project?" If the answer is "Website", a "Platform" field appears. If it's "Branding", that field stays hidden and a "Brand assets" field shows instead.
Without this, you put all fields on the form and tell users to skip the ones that don't apply. They don't. You get garbage data.
Dynamic field options
The options in one field change based on another field's answer.
Example: A form asks users to select a Department, then select a Manager. The Manager options should only show people from the chosen department, not everyone in the company. With static forms, users pick from a list of 50 people. With dynamic options, they pick from 4.
Conditional page breaks (multi-step logic)
Different users see different pages or steps based on their answers.
Example: A grant application form sends individual applicants to pages 2-4, and organizational applicants to pages 2-3 and 5-6. Same form, different paths.
Follow-up questions
A specific answer triggers an additional question immediately after.
Example: A feedback form asks "Would you recommend us?" If the answer is "No" or "Maybe", a follow-up field appears: "What would need to change?" If the answer is "Yes", that question stays hidden.
All four of these are absent from native Airtable forms.
Why native Airtable forms can't do this
Airtable's form builder is a view type, the same way Grid, Gallery, and Calendar are view types. It's designed to give you a quick form attached to a table. That's the scope of the feature.
It's genuinely useful for simple internal data collection. But the form builder hasn't had significant feature investment in years.
Here are the practical constraints.
- No field visibility rules: You can mark fields as required or optional, but that's the extent of field control.
- No page logic: Native forms are single-page. There's no multi-step capability at all.
- No linked record selection: Linked record fields in native forms become text fields. Users type values instead of selecting from your actual tables.
- No calculations: You can't display formula or lookup values to the user.
Airtable knows these limitations exist. Their answer has been Airtable Interfaces, which is a different product entirely and not a form builder in the traditional sense.
For forms with conditional logic, you need a third-party tool.
How to add conditional logic with Filla
Filla is a form builder built specifically for Airtable. You connect it to your base via OAuth, and your fields, tables, linked records, and options sync automatically. No field mapping.
Here's how each type of conditional logic works.
Step 1: Connect your Airtable base
Sign up at app.filla.io/signup, authorize the Airtable OAuth connection, then select the base and table you want to build a form for.
Your fields appear immediately. You don't manually configure anything. A single select field in Airtable shows up as a single select in Filla, with all the current options already loaded.
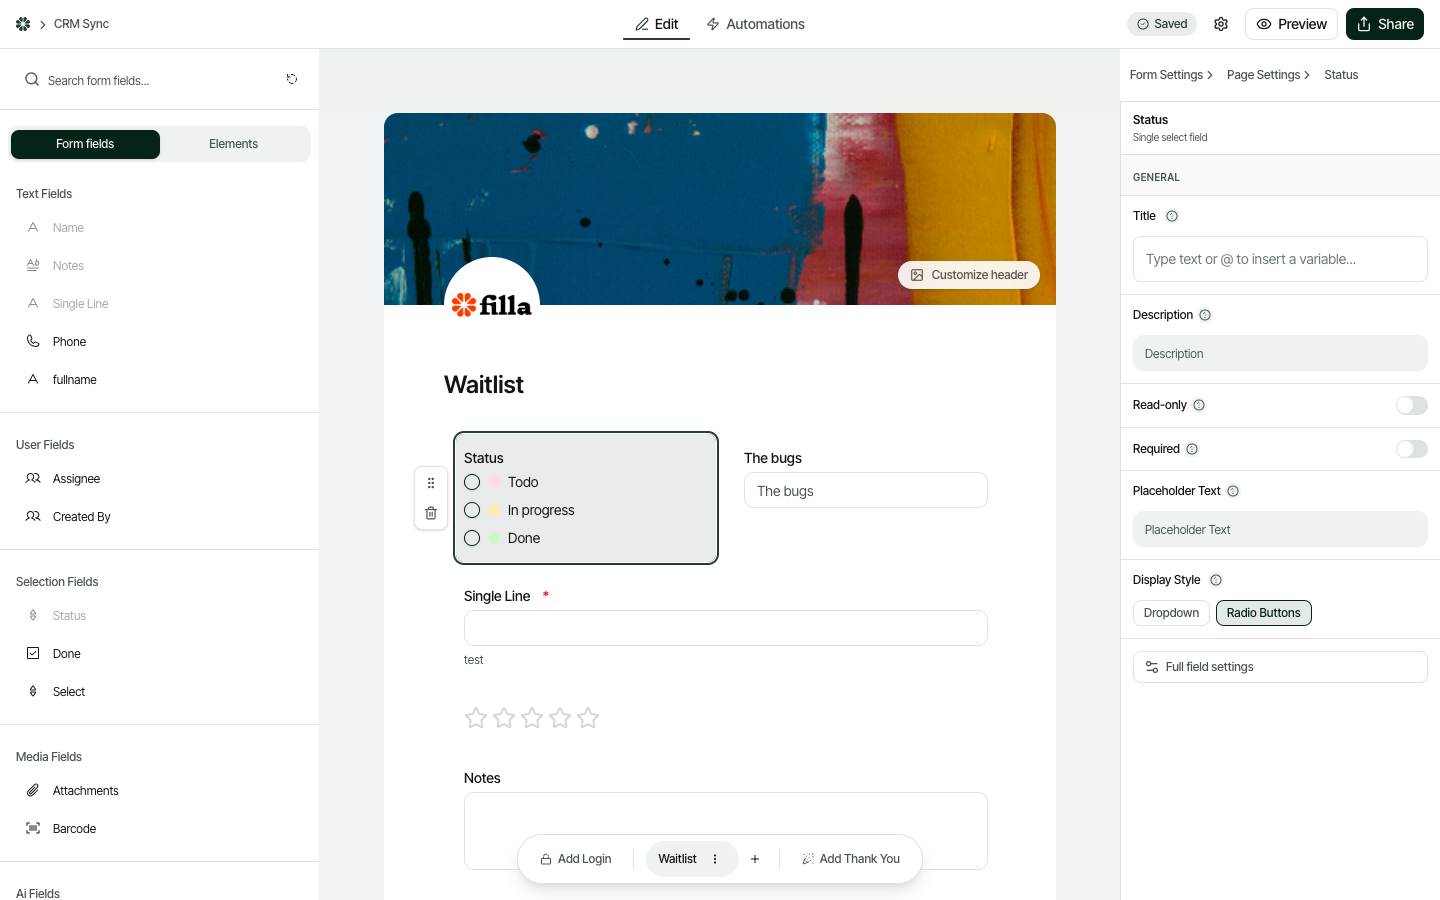
Step 2: Add fields to your form
Drag fields from the right panel into your form layout. At this point, it's a standard form with all fields visible to everyone.
Step 3: Add show/hide rules to fields
Click any field in the form editor. A "Conditions" panel appears on the right. This is where conditional logic lives.
Click "Full field settings" to open the advanced settings dialog. Select the Visibility tab to access the condition builder.
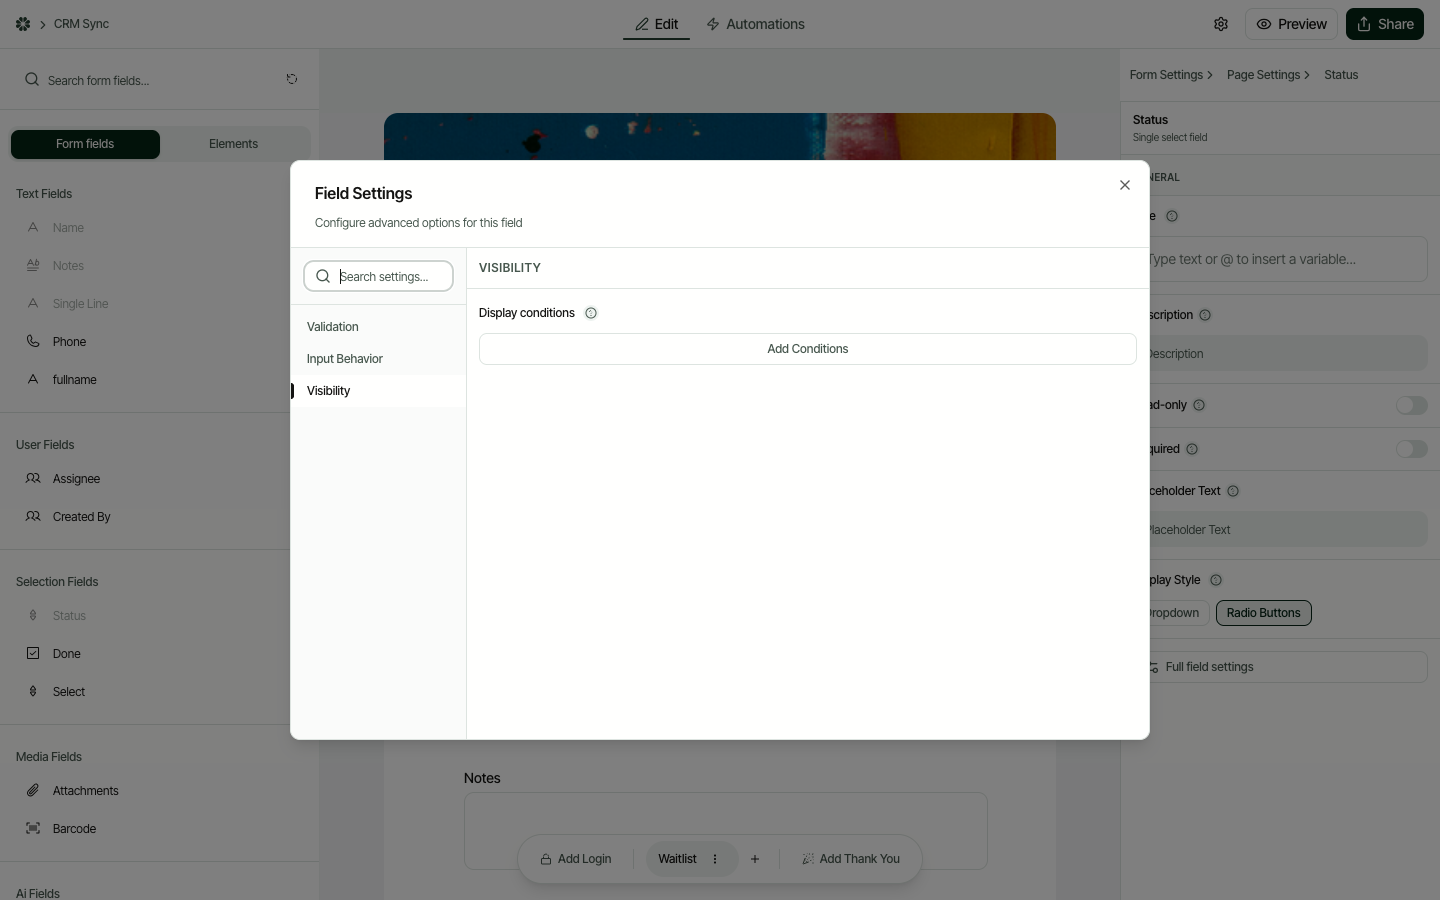
You'll see: "Show this field when..."
Then you set your condition:
- Field: Which field to watch
- Operator: is, is not, contains, is empty, is not empty
- Value: The specific value that triggers the rule
You can add multiple conditions with AND or OR logic.
Example: Show a "Shipping address" field only when the user selects "Physical delivery"
- Click the "Shipping address" field
- Open Conditions
- Set: Show when "Delivery method" is "Physical delivery"
Now that field is invisible until the user picks that option.
Example: Show a "Follow-up contact" field when satisfaction rating is below 4
- Click "Follow-up contact"
- Set: Show when "Satisfaction rating" is less than 4
Users who rate 4 or 5 never see that field.
Step 4: Set dynamic options for linked record fields
This is where Filla goes further than most form builders.
Linked record fields in Filla pull from your actual Airtable tables. If you have a Clients table with 200 records, your form shows all 200 as selectable options.
To make those options conditional:
- Click a linked record field
- Open "Filter options"
- Set a filter based on another field value
Example: A project form where "Team lead" options filter based on selected "Department"
You have a People table with a "Department" field. Your form has a Department picker, then a Team lead picker.
In the Team lead field, set filter: "Department (from People table) matches the Department field value."
Now if someone selects "Design", only designers appear as team lead options.
This works because Filla reads your actual Airtable data at form load time, not a static copy.
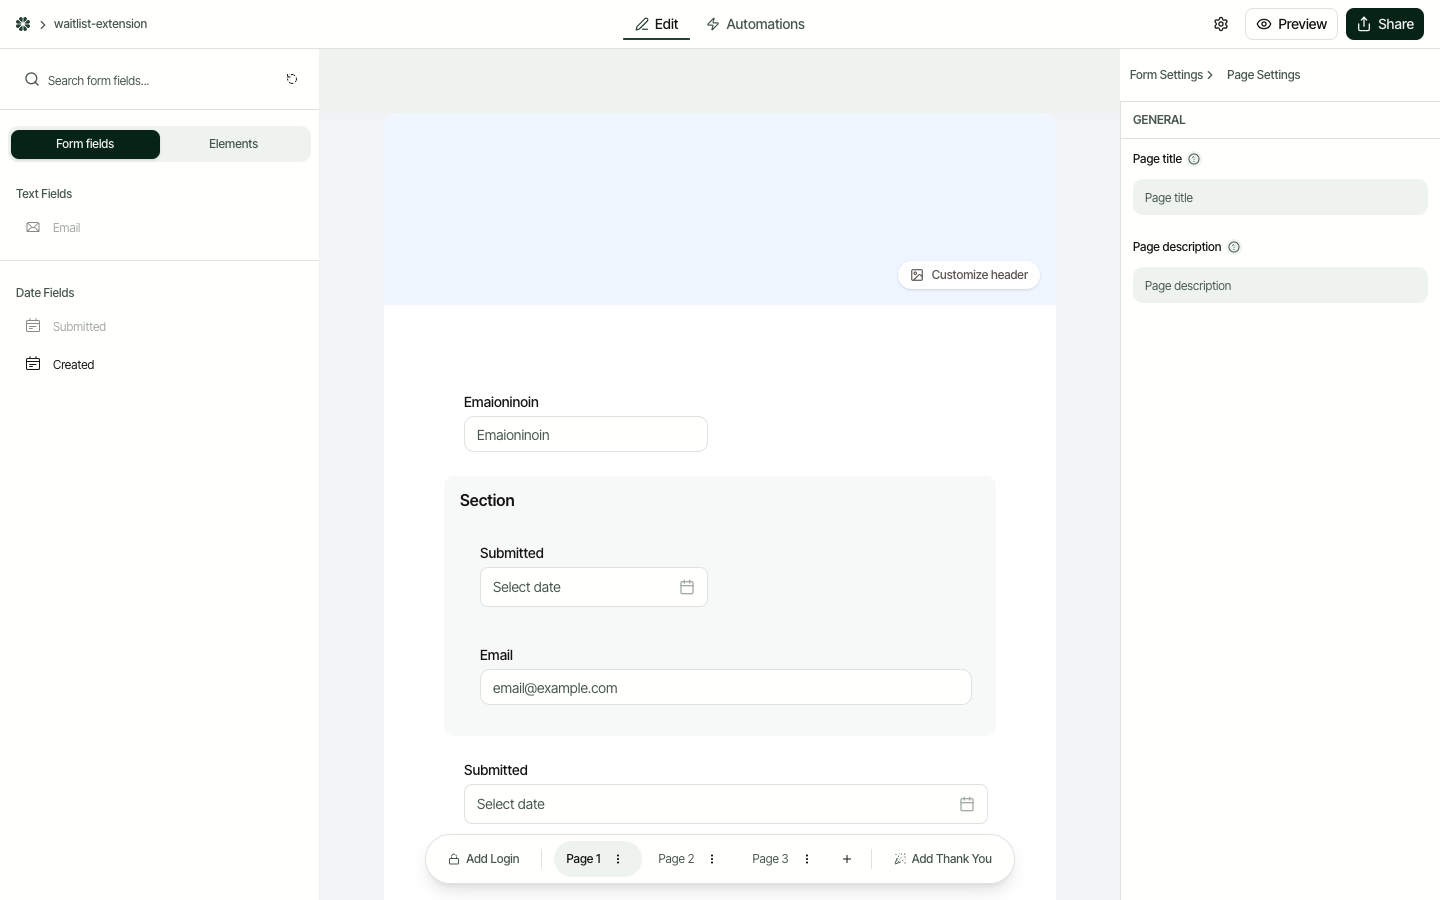
Step 5: Build multi-step forms with conditional page breaks
Filla supports multi-page forms. Pages appear in sequence, and you can attach conditions to each page transition.
To create conditional paths:
- Click "Add page" to create a new section
- On any page, click "Page settings"
- Set the condition under which this page appears
Example: An intake form with different paths for new vs. existing customers
- Page 1: "Are you a new or existing customer?" (everyone sees this)
- Page 2 (condition: "New customer"): Contact info, company details, discovery source
- Page 3 (condition: "Existing customer"): Account lookup, update preferences
Both paths end at Page 4 (shared): Service selection and submission.
Users only see the pages relevant to them. The URL and data submission are the same regardless of path.
Important note about required fields and skipped pages: If a field is required but on a page that gets skipped, the requirement doesn't block submission. Filla only validates fields on pages that are actually shown.
Step 6: Apply show/hide rules to entire sections
Sections in Filla group related fields under a collapsible header. Instead of attaching the same condition to every field individually, you can apply one rule to the whole section.
To set up a section-level condition:
- Click a section header in the editor
- Open the Show/hide rules panel on the right
- Set conditions the same way as field-level conditions
When the conditions aren't met, the entire section disappears -- not collapsed, not greyed out, completely gone. No empty space, no visible placeholder.
Why this beats field-level for dense forms: A 6-field "International shipping" block that should only appear for non-US countries is one section condition, not six identical field conditions. One rule, six fields hidden.
Example: Conditional compliance section
A contract intake form has a "Regulatory compliance" section with five questions about GDPR, HIPAA, and SOC 2 -- only relevant to clients in regulated industries.
Set the section condition: show when "Industry" is "Healthcare" OR "Financial services" OR "Legal."
Everyone else skips past it without seeing the fields or the section header.
Step 7: Add If/Else branches to automations after submit
Conditional logic isn't only about what the user sees on the form. After a form is submitted, you can run different automations depending on what was submitted. This is server-side conditional logic -- the workflow that triggers after the form closes.
To set up an automation branch:
- Open the Automations tab in the Filla editor
- Add an If/Else action to any automation
- Define branches -- each branch has a condition and a list of actions to run when that condition matches
Example: Different PDFs for different customer types
Your order form has a "Customer type" field with options: Standard, Wholesale, Enterprise.
- If "Customer type" is "Enterprise": generate the enterprise contract PDF + send a webhook to notify the sales team
- If "Customer type" is "Wholesale": generate the wholesale order confirmation PDF
- Else (Standard): generate the standard receipt PDF
One form, three distinct post-submit paths.
Example: Route low-budget submissions for triage
Your application form has a "Budget" field. Applications with budgets under $5,000 should be flagged.
- If "Budget" is less than 5000: update the record's "Status" field to "Triage" + fire a webhook to Slack
- Else: update the record's "Status" field to "Qualified"
The record lands in Airtable already categorized -- no manual review step required.
Real examples: Forms that adapt to their users
Client intake form that changes by service type
A consulting firm collects intake for three service types: strategy, design, and development. The questions overlap but differ by type.
Before (without conditional logic):
They maintained three separate forms. When they updated their pricing tiers, they had to update all three. Two of three got updated. The third collected wrong data for three weeks before anyone noticed.
After (with Filla):
Single form. First question: "What type of engagement?" Answer drives everything else.
- Strategy path: Company goals, current pain points, stakeholders, timeline
- Design path: Brand guidelines, existing assets, deliverables, reference examples
- Development path: Tech stack, existing codebase, integrations, performance requirements
All three paths share: Budget range, contact info, deadline.
One form to maintain. One place to update. Clean data automatically segmented by service type in Airtable.
Feedback form with smart follow-ups
A SaaS product team collects post-support feedback. They want detailed responses from unhappy users, and they want satisfied users to answer quickly.
The form:
- "How satisfied were you with the support?" (1-5 rating)
- If rating is 1 or 2: "What went wrong?" (long text, required)
- If rating is 1 or 2: "What would have made this better?" (long text)
- If rating is 4 or 5: "What did we do well?" (long text, optional)
- All ratings: "Any other comments?" (long text, optional)
Users rating 3 skip the detailed follow-ups entirely (the most neutral responses tend to be the least actionable).
The result: Average completion time dropped because most users answered 2-3 questions instead of 5. Response quality improved because unhappy users had targeted questions to answer, not a generic open field.
Common mistakes with conditional logic
Hiding required fields by default. If a field is required but hidden by a condition, and the condition is never true for some users, they still can't submit. Check: if a field is conditionally shown, it should only be required if it's shown.
Too many conditions on a single field. Users can tell when a form is hunting for the right question to ask. Forms that flash fields in and out feel broken. Keep conditions simple and linear. If you need a complex decision tree, consider whether multi-step pages handle it more clearly than field-level show/hide.
Forgetting about mobile. Conditional fields that appear mid-form on desktop feel natural. On mobile, a new field appearing below what the user just answered can be disorienting. Test your conditional forms on a phone before deploying.
Not testing every path. A form with 3 conditional branches has at least 3 separate paths to test. Test all of them. Broken conditions fail silently: the form submits without the data you expected.
FAQ
Does Airtable have any plans to add conditional logic to forms?
Not officially announced. Airtable's Interfaces product adds conditional logic for some data views, but that's a different product from forms. For forms specifically, there's no timeline publicly shared. The safe assumption is that if you need conditional logic now, you need a third-party tool.
Can I use Filla's conditional logic with linked record fields?
Yes. You can both filter linked record options based on other field values, and show/hide linked record fields conditionally. For example, a "Project" linked record field can be hidden until the user selects a client, then filter to show only that client's projects.
What happens to conditionally hidden fields in my Airtable record?
They stay empty. If a field is hidden and the user never sees it, the submission creates a record with that field blank. This is correct behavior. The field exists in your table, it just has no value for that record.
Can I have different required fields on different paths?
Yes. A field's required status applies only when it's visible. If a field is hidden by a condition, it won't block submission even if it's marked required. You can mark every conditional field as required without worrying about users getting stuck.
How does this affect Airtable automations?
It doesn't. Filla writes to your Airtable base just like any other data source. Automations that trigger on record creation or field changes work exactly as configured. If you have an automation that fires when "Service type" is set to "Design", it fires correctly from Filla form submissions.
Filla documentation
- Display conditions
- Page visibility
- Building filter rules
- Conditional visibility
- Conditional read-only